PayPal
 Stripe
 QuickBooks
 Zoom
Zoom Google Meet
 Zapier
 Mailchimp
How to use our Administration Tool
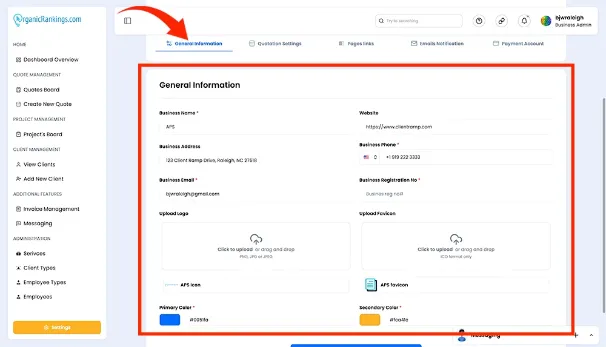
An administrative software solution acts as a centralized hub for handling system settings, managing user profiles, and streamlining daily operations. It allows administrators to customize system functionalities to fit organizational goals by designating user roles, setting access privileges, and enforcing security measures. These solutions often come with features like live dashboards for insightful monitoring, comprehensive audit logs, and dependable options for data protection and recovery. Many also support seamless connectivity with external systems, facilitating smooth data integration and uninterrupted workflows. By simplifying complex administrative processes and granting detailed control, these tools to manage projects that contribute to stronger security, increased efficiency, and a more seamless user experience.
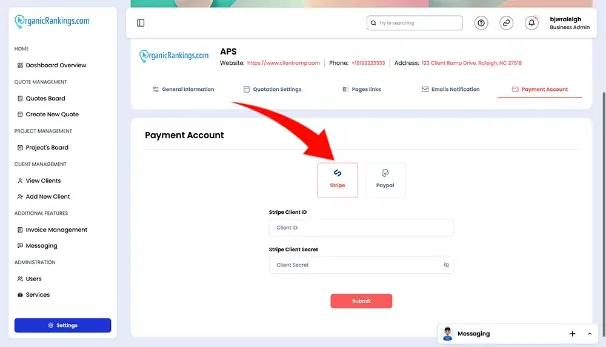
Understanding Stripe Client ID and Secret Key
The Stripe Client ID and Secret Key page is where you can seamlessly integrate your Stripe account with your Client Ramp account for secure and efficient payment processing. This page allows you to enter your Stripe Client ID and Secret Key, enabling a direct connection between the two platforms. Once connected, you can manage payments, issue invoices, and track transactions directly within your Client Ramp dashboard. By linking your Stripe account, you ensure a smooth and professional payment experience for your clients while maintaining the security and reliability Stripe is known for.
To obtain your Publishable Key and Secret Key from Stripe, you need to have a Stripe account (www.stripe.com).
Go to www.stripe.com and click "Sign In".
After logging in, your Stripe dashboard will open. From the left-hand menu, click "Developers" and then "API keys".
On the "API keys" page, you'll find the Publishable Key under Standard Keys. To view the Secret Key, click the button labeled "Reveal live key token" above the Secret Key field.
Sandbox and Live Modes
To toggle between Sandbox (Test Payments) and Live (Real Payments) modes, click "View test data" in the left-hand menu. Remember, Sandbox and Live modes use different keys.
Integrating PayPal Client ID and Secret Key
The PayPal Client ID and Secret Key page allows you to easily integrate your PayPal account with your Client Ramp account, enabling seamless payment management. On this page, you can input your PayPal Client ID and Secret Key to establish a secure connection between the two platforms. Once connected, you can handle payments, send invoices, and track transactions directly from your Client Ramp dashboard. This integration ensures a smooth, secure, and efficient payment experience for your clients, leveraging PayPal’s trusted payment processing capabilities to enhance your business operations.
To proceed, ensure that your PayPal email address is confirmed. Additionally, you must have a verified PayPal Business account before generating live API credentials. Follow these steps to obtain your Client ID and Secret Key:
Log In: Access the PayPal Developer Portal using your live PayPal credentials.
Navigate to Apps & Credentials: From the top menu, click Apps & Credentials. Choose either Live (for production) or Sandbox (for testing), depending on your requirements.
Create a New App:
Click Create App in the top-right corner.
Provide a name for your REST API app in the App Name field.
Select the application type (Merchant or Platform).
Associate your app with a Sandbox business account (if applicable).
View Your API Credentials: After clicking Create App, your Client ID and Secret Key will be displayed on the app details page.

Managing Calendy API
The Managing Calendly API page allows you to connect your Calendly account to your Client Ramp account, streamlining scheduling and appointment management. By entering your Calendly API key on this page, you can integrate the two platforms to synchronize calendars, schedule client meetings, and automate reminders directly within your Client Ramp workflow. This connection ensures that you never miss an appointment and makes it easy to coordinate with clients efficiently. With the Managing Calendly API page, you can enhance productivity and maintain a seamless scheduling experience for both your team and your clients.
How to authenticate with personal access tokens
Follow the procedures below to generate a personal access token and authenticate an internal or private application with the Calendly API v2. Do not share your personal access token with public sources or reuse it across applications.
To further secure your personal access tokens, we do not display or store them in your Calendly account. After generation, they’re unretrievable.
Note: If you need to register and authenticate a public application, see: Create a Calendly developer account
Log in to your Calendly account
Go to the Integrations Page
Select the API & Webhooks tile
If you have no prior personal access tokens, select Get a token now under Personal Access Tokens.
If you already have a token, select Generate new token under Your personal access tokens.
At Create your personal access token, create an identifiable name for your token and select Create Token, then Copy token.
Managing QuickBooks API
The Managing QuickBooks API page allows you to integrate your QuickBooks account with your Client Ramp account for streamlined financial management. By connecting the two platforms through the QuickBooks API, you can sync invoices, expenses, and client payment details directly into your QuickBooks system. This integration helps you eliminate manual data entry, reduce errors, and maintain accurate financial records. From this page, you can input your QuickBooks API credentials to establish a secure connection, enabling seamless tracking of your business finances while keeping everything organized within your Client Ramp workflow.
Create an account in the Intuit Developer portal.
Create an app under your developer account.
Find your client ID and client secret under the Keys & OAuth tab of your app.
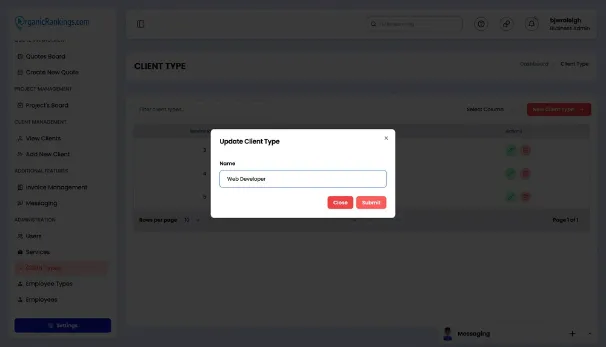
Updating Client Types
The Updating Client Types page allows you to easily manage and adjust the different roles and classifications of clients within your business. From this page, you can modify existing client types, such as regular clients, premium clients, or one-time customers, to better align with your current business needs. You can update the details associated with each client type, including service offerings, pricing structures, and permissions. This feature helps ensure that your client classifications remain accurate and adaptable, enabling you to provide tailored services and maintain clear communication with each client segment.
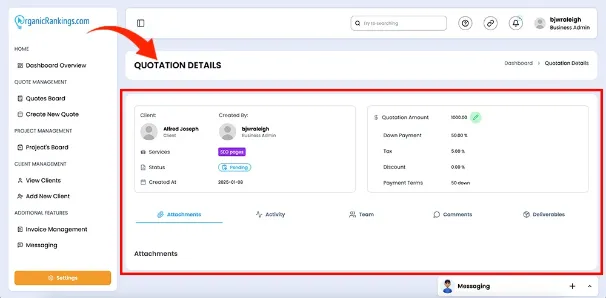
Understanding Quotation Details
The Understanding Quotation Details page provides a comprehensive view of all the essential information related to a specific quote. From this page, you can easily review the quote’s key details, including the client’s name, requested services, pricing, payment terms, and delivery timelines. It also allows you to modify these details as needed, whether it’s updating the quotation amount, adjusting terms, or adding additional notes. This page ensures that you have full visibility into every aspect of the quote, helping you make informed decisions and maintain accurate, up-to-date records for smoother client communication and efficient quote management.