How to Manage Payments
Managing payments in project management is crucial for ensuring that both the project stays within budget and that all stakeholders are compensated on time. To effectively manage payments, project managers should establish clear payment terms upfront, including timelines, amounts, and milestones tied to specific deliverables or phases of the project. This can be formalized in a contract or agreement, reducing misunderstandings. Regular tracking of expenses and invoicing is also key—using project management software or financial tools to monitor spending helps prevent overspending or missing payments. When payments are tied to milestones, it’s important to ensure that each milestone is completed and approved before invoicing. Communication with clients and vendors should be consistent, keeping everyone updated on payment schedules and any changes in scope or costs. By staying organized, proactive, and transparent about financial matters, project managers can help maintain a healthy cash flow and ensure that all parties involved are paid appropriately and on time.
Using Stripe Client ID and Secret Key
To obtain your Publishable Key and Secret Key from Stripe, you need to have a Stripe account (www.stripe.com).
Go to www.stripe.com and click "Sign In".
After logging in, your Stripe dashboard will open. From the left-hand menu, click "Developers" and then "API keys".
On the "API keys" page, you'll find the Publishable Key under Standard Keys. To view the Secret Key, click the button labeled "Reveal live key token" above the Secret Key field.
Sandbox and Live Modes
To toggle between Sandbox (Test Payments) and Live (Real Payments) modes, click "View test data" in the left-hand menu. Remember, Sandbox and Live modes use different keys.
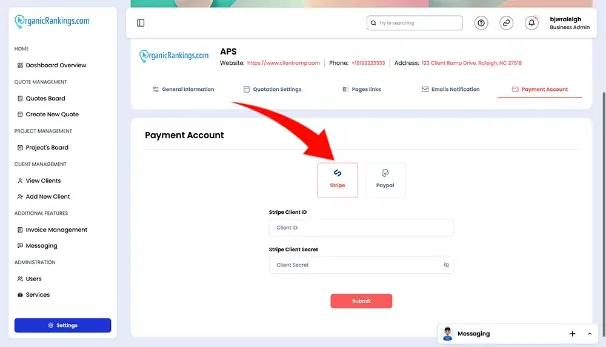
Using PayPal Client ID and Secret Key
To proceed, ensure that your PayPal email address is confirmed. Additionally, you must have a verified PayPal Business account before generating live API credentials. Follow these steps to obtain your Client ID and Secret Key:
Log In: Access the PayPal Developer Portal using your live PayPal credentials.
Navigate to Apps & Credentials: From the top menu, click Apps & Credentials. Choose either Live (for production) or Sandbox (for testing), depending on your requirements.
Create a New App:
Click Create App in the top-right corner.
Provide a name for your REST API app in the App Name field.
Select the application type (Merchant or Platform).
Associate your app with a Sandbox business account (if applicable).
View Your API Credentials: After clicking Create App, your Client ID and Secret Key will be displayed on the app details page.

Create QuickBooks
When setting up your QuickBooks integration, you must enter the name of the account you wish to create in QuickBooks.

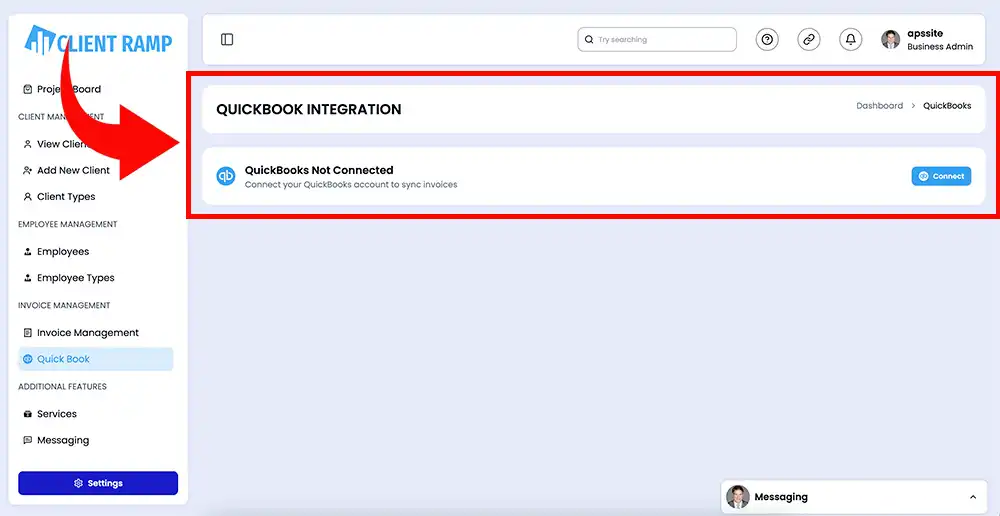
QuickBooks Integration
Link your QuickBooks account to sync invoices, saving you time and simplifying invoice management.
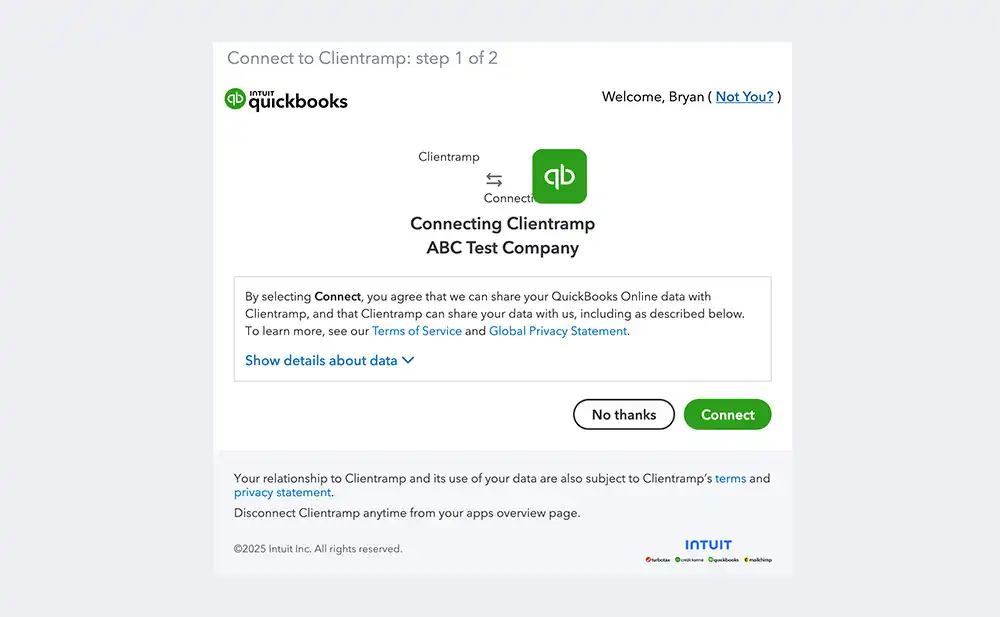
Connecting QuickBooks
To connect your QuickBooks account to ClientRamp, select "Connect" to agree to share your QuickBooks Online data with ClientRamp, and vice versa. To learn more, see our Terms of Service and Global Privacy Statement.
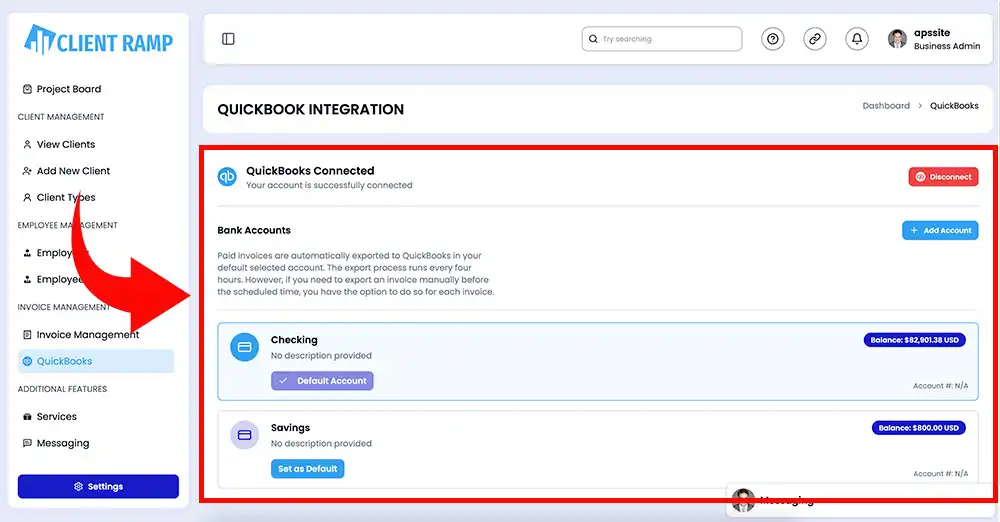
QuickBooks Connected
Easily link your QuickBooks account to ClientRamp. Paid invoices are automatically exported to your selected QuickBooks account every four hours. You can also manually export invoices before the scheduled export time.