PayPal
 Stripe
 QuickBooks
 Zoom
Zoom Google Meet
 Zapier
 Mailchimp
Step-by-Step Guide to Setting Up Your White Label Portal
Automate your quoting and project workflow with ClientRamp by generating a custom widget you can embed into your website—unlocking the full power of ClientRamp's automation tools. For an overall view of our process you can view our Flow Chart.
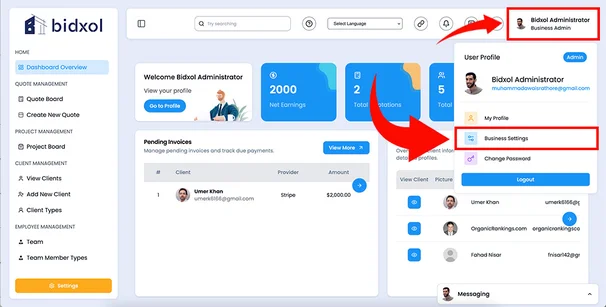
1. Access Business Settings
Click on the "Business Admin" tab in the top right corner of your dashboard. From the dropdown menu, select "Business Settings."
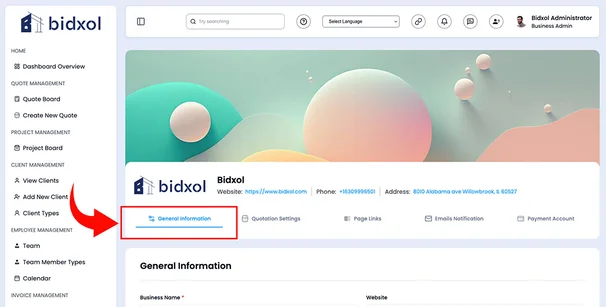
2. Customize Your Branding and Layout
Navigate to the "General Information" tab. Here, you can personalize the layout of your client-facing page. Complete all the fields highlighted with red arrows to match your branding.
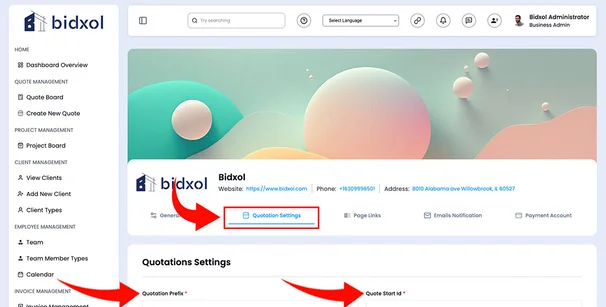
3. Configure Your Quotation Settings
Go to the "Quotation Settings" tab and enter the necessary details to define how your quotes are generated and displayed to clients.
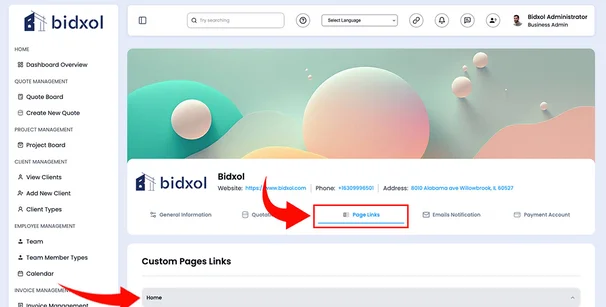
4. Set Up Your Website Navigation
Add up to three custom navigation links that will appear in your white-labeled client portal. Choose the most relevant links for your users.
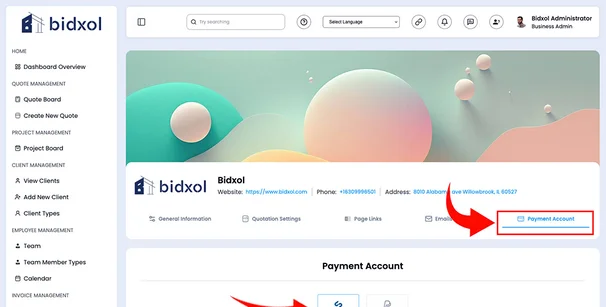
5. Choose Your Payment Methods
Under the "Payment Account" tab, select the payment methods you'd like to offer. You can choose multiple options, and we're continuously adding more providers—so your preferred method may be available soon.
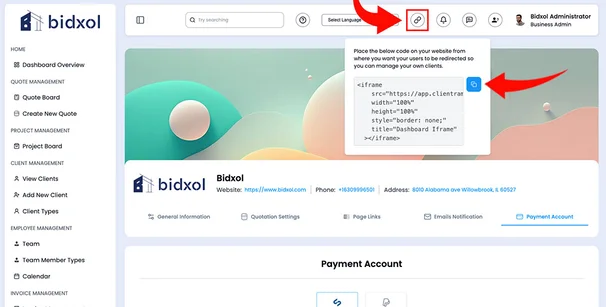
6. Embed The Widget On Your Website
Click the button to copy your widget code. Paste this code into any page of your website to enable new and returning users to:
- Sign up for your services
- Submit new projects
- Track the status and history of their ongoing and completed projects
7. View ClientRamp On Your Website
Now you can view the ClientRamp software on your website for your users to sign up and submit their projects to you.